Add Documents from Zipforms
With Disclosures.io, you can create great looking disclosure packages, collaborate on them with your team and share them with interested parties (like Buyer Agents).
Step By Step Instructions
1. Get Your Property Package Email Address
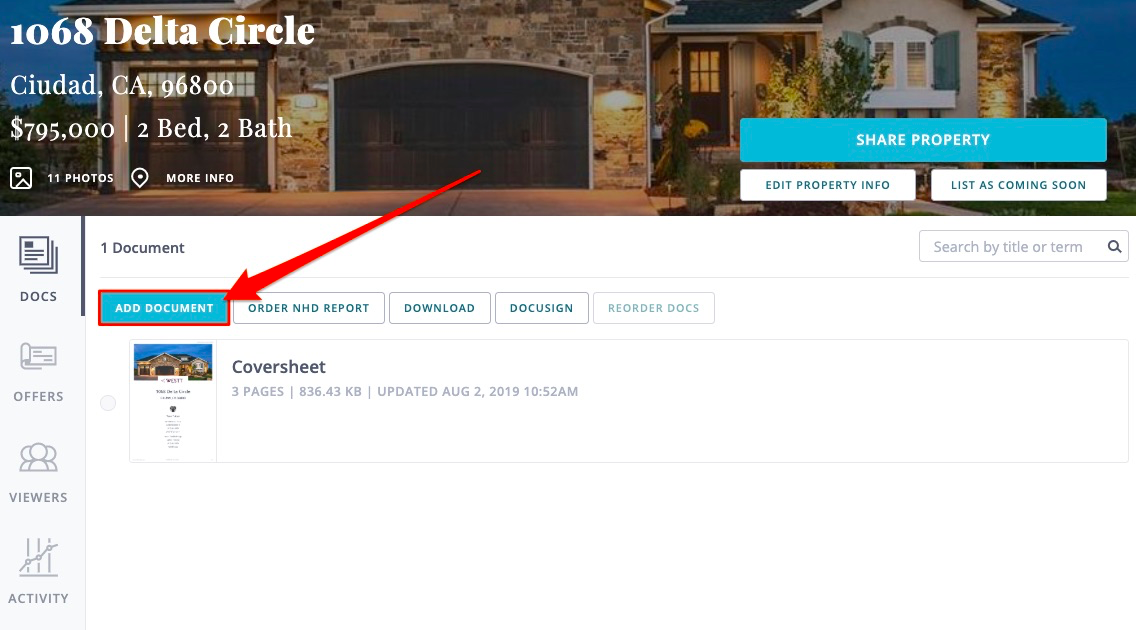
To get started, login to your Disclosures.io account, create a property package and select the “Add Documents” button.
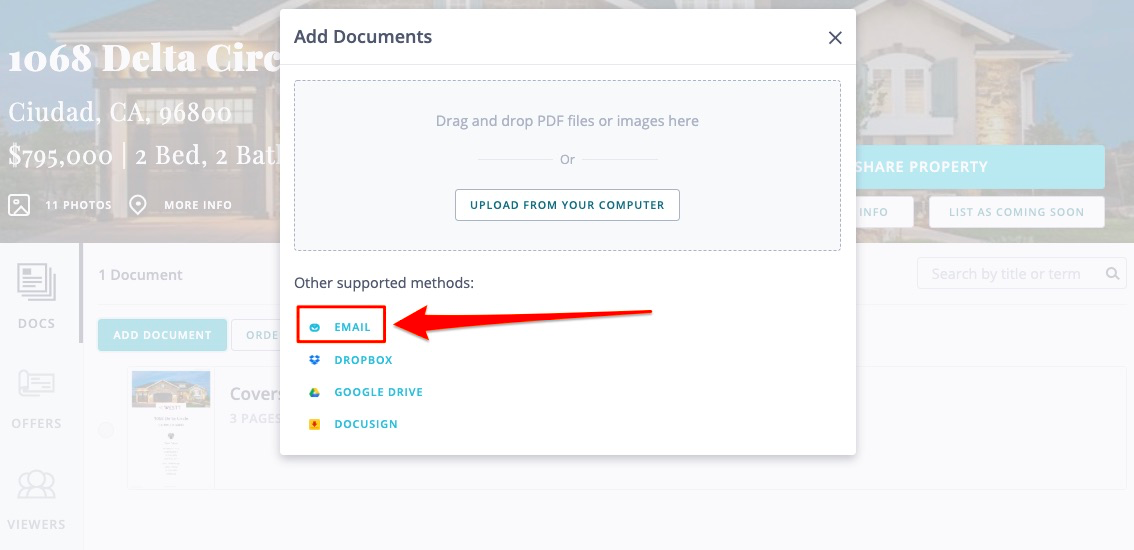
A window will appear with a variety of ways to add documents to your property package, select the email option.
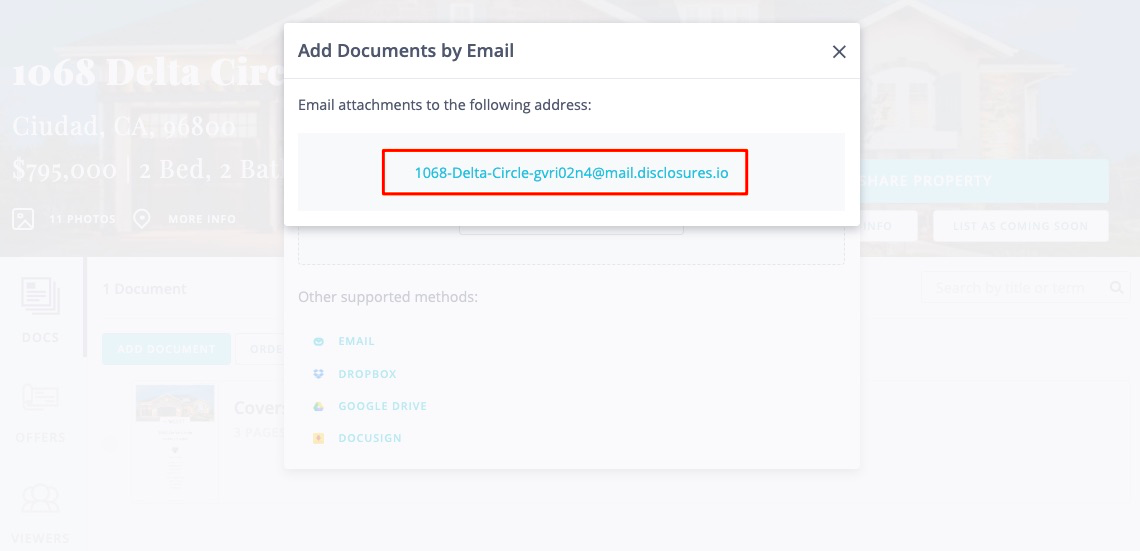
A unique email address created specifically for your disclosure package will be available to use. You can click on the email once to copy it to your clipboard. This email can be used to forward the completed documents into the disclosure package.
2. Gather Your Documents in Zipforms
The next thing is to login to your Zipforms account and select the documents that need to be reviewed and filled out by the sellers. As a listing agent you’ll want to make sure that the address and sellers names are filled in and are correct. Once the address and names have been added, select the documents tab, you will see the option to email the disclosures.
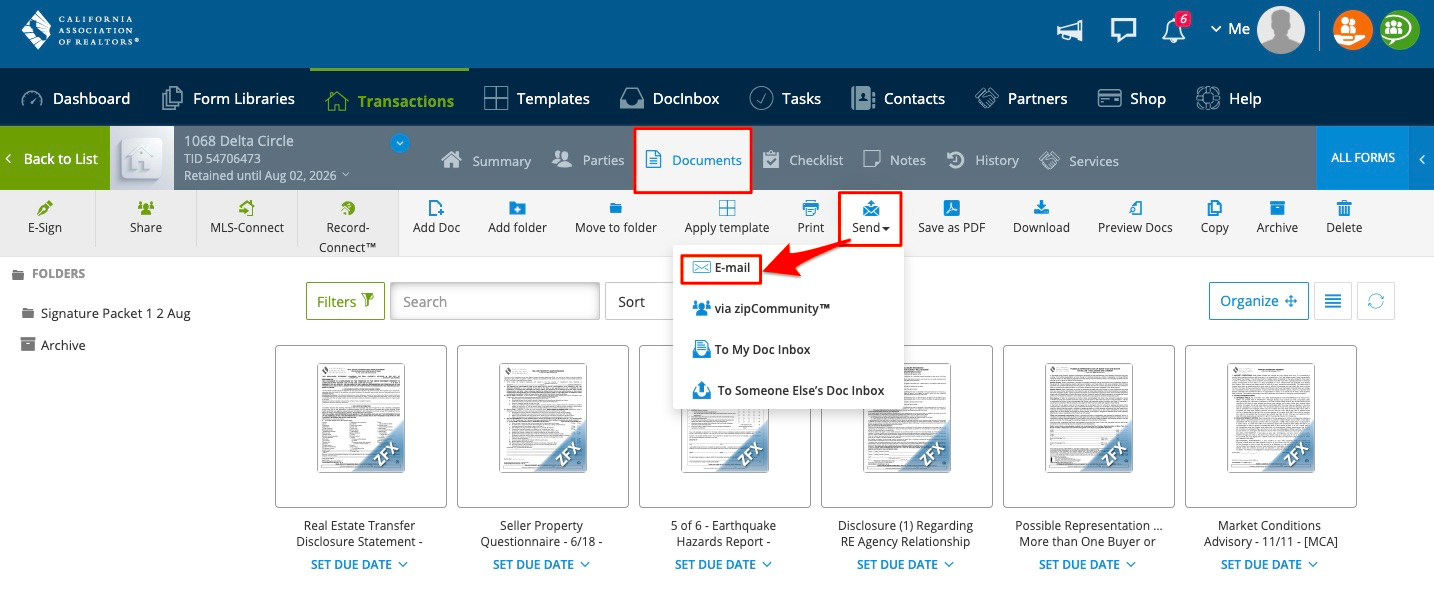
By selecting the email option you’ll now be able to go in and choose the documents you would like to send.
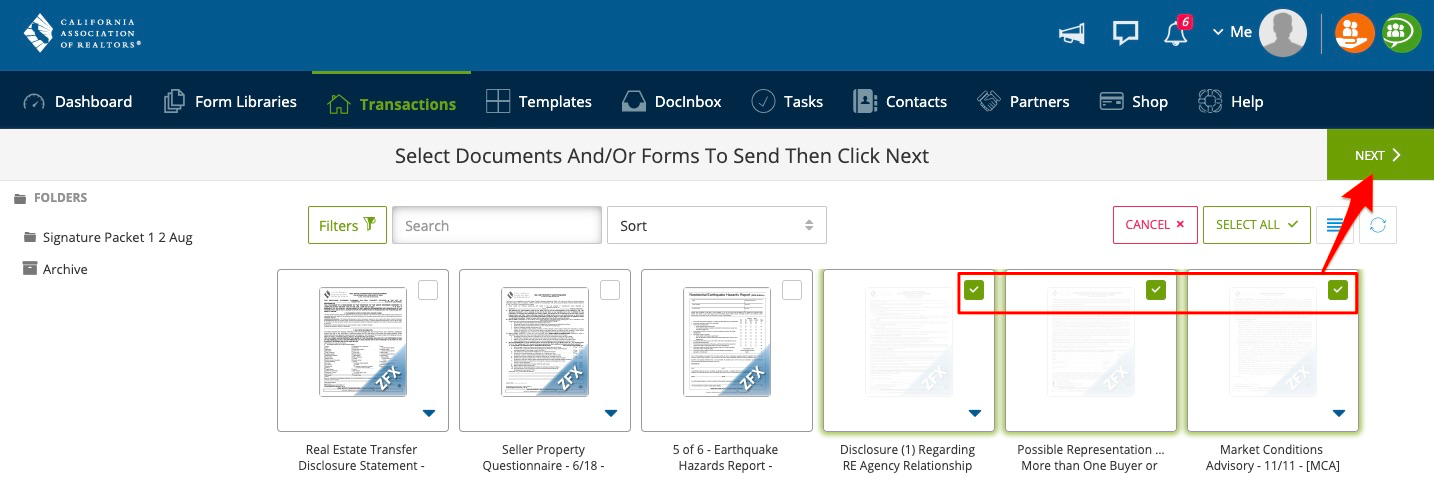
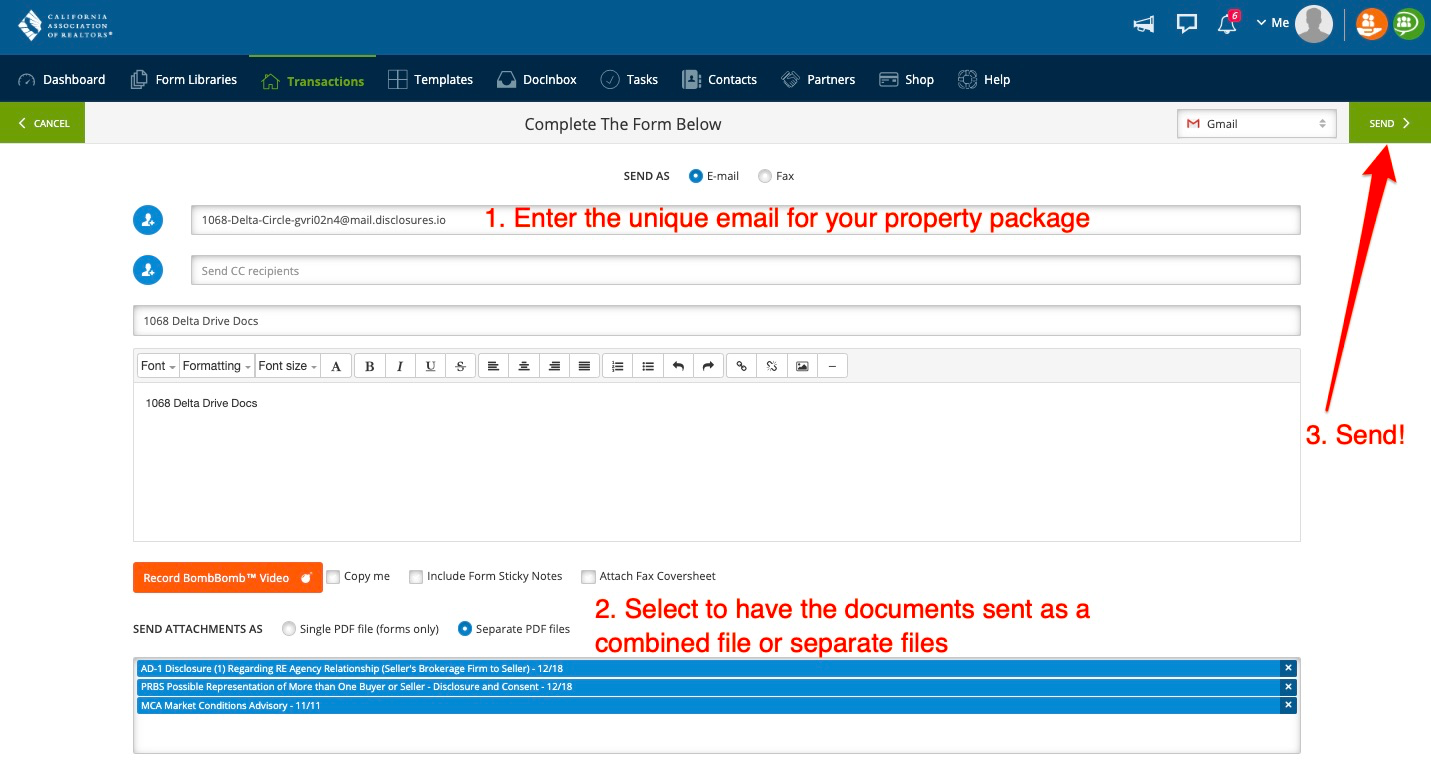
You’ll be asked to complete the form below.
- Enter the private email for your disclosure package from Disclosures.io.
- Select the documents to be sent as either a Combined PDF or separate PDF files.
- Send!
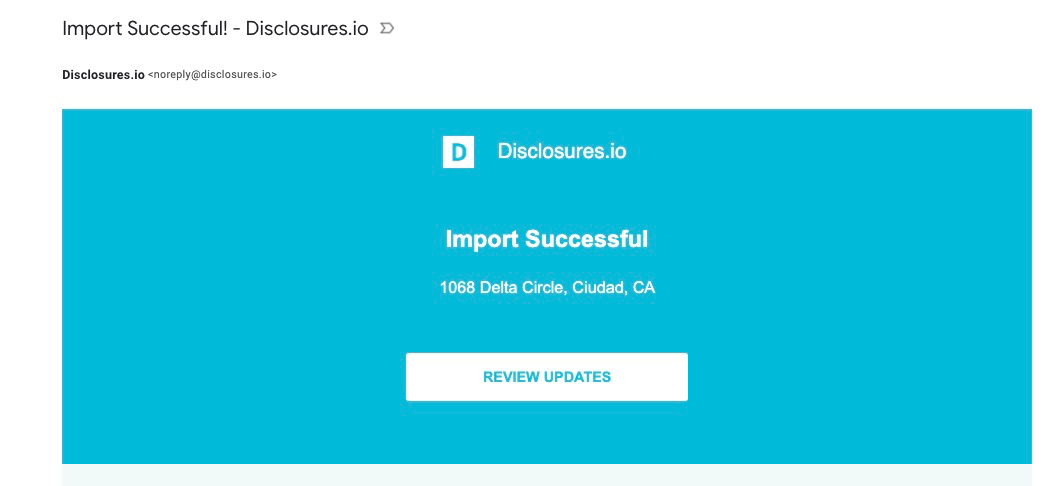
Once you hit send you’ll get a notification from Zipform to let you know your documents have been sent. You’ll also receive an email notification from Disclsoures.io to let you know that your documents have been imported and are available in your disclosure package.
3. Editing Completed Documents
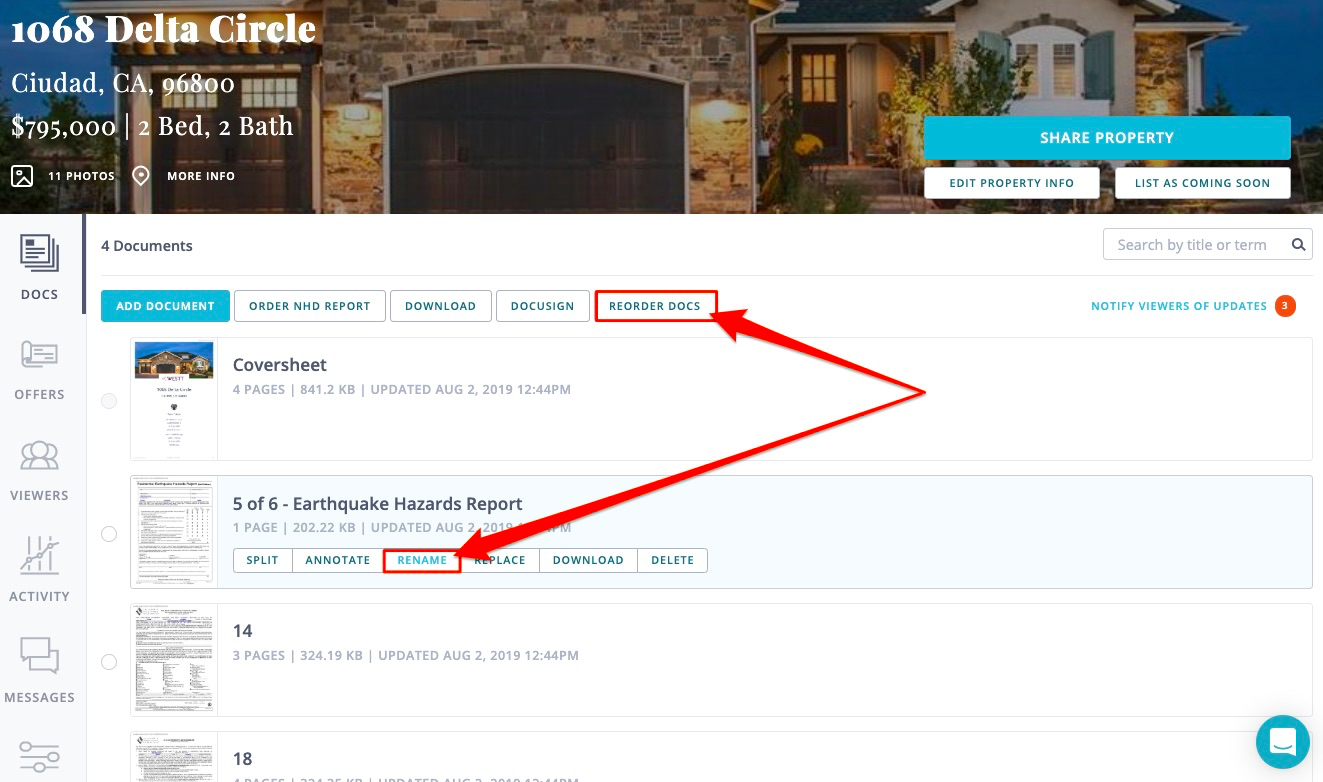
To edit the names and order of the documents select the rename and reorder docs options in your property package.
